
How to make string art?
2024-01-02
Creating string art is a popular and enjoyable craft activity. Here’s a simple step-by-step guide:
Firstly, Preparing the materials:
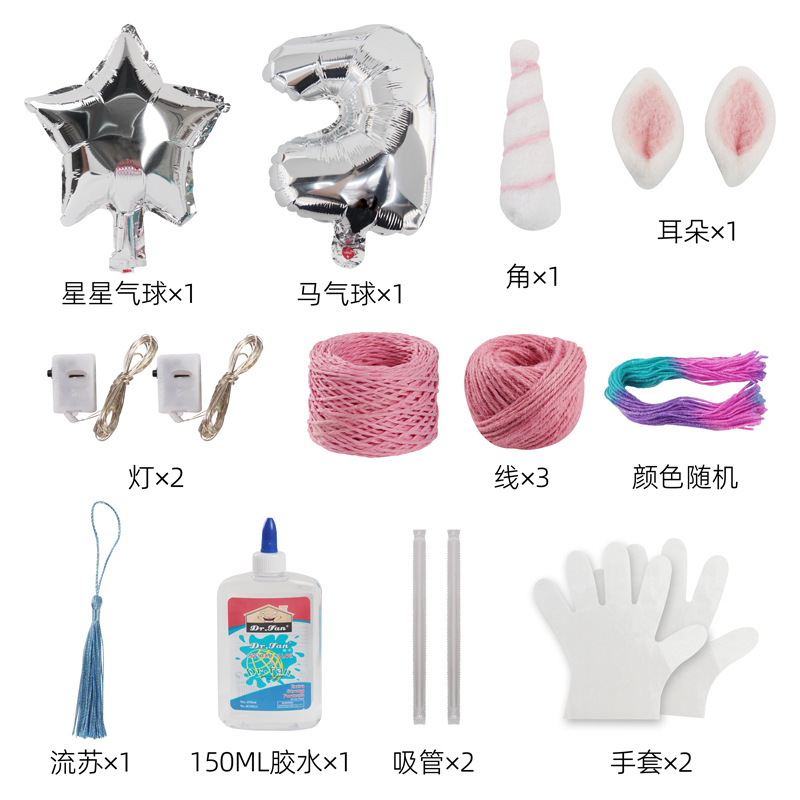
1.Different shapes of balloons
2.Wire.
3.Glue
4.Lights
5.Several disposable gloves
6.Several decor parts
7.Straws
Secondly, Start to make your own string art
1.Inflate the balloon: blow up the balloon to the size you like and tie it securely.
2.Prepare the glue: mix up enough thick glue in a container for the string to soak in.
3.Soak the string in glue: thoroughly soak the string in the glue, making sure it's fully covered.
4.Wrap the string: Start at one end of the balloon and continually wrap the string around it until you've used up all the string or until you're satisfied. Remember, you might need to let the string sit in the glue for a while to ensure it fully hardens.
5.Wait for it to dry: Hang the balloon up and wait for the glue to completely solidify and dry. This process may take a while, depending on the type and thickness of glue you used.
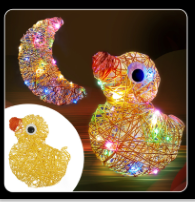
6.Deflate the balloon: Once the glue has hardened, gently puncture the balloon and remove it from inside of the lantern. This will leave a perfect spherical structure formed by the string you wove before.
7.Decorate: Lastly, you just need to wrap the fairy lights around the string or place them inside the lantern to create a unique balloon lantern.
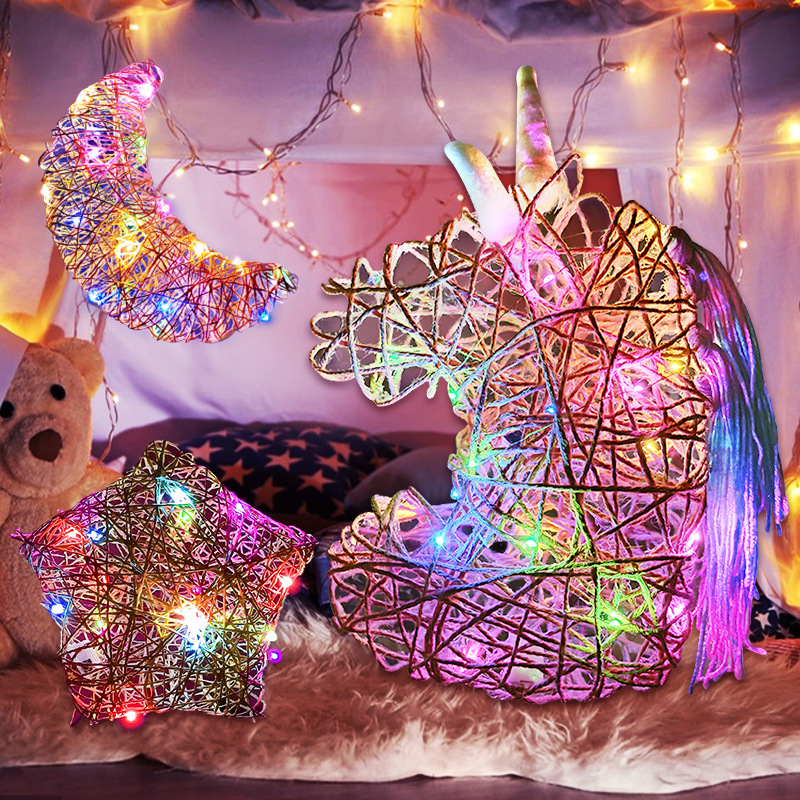
In the end, don't forget safety first, especially when dealing with wires, switches, or any object that could potentially carry electricity.